How google deep dream works
Содержание:
Jouer avec Deep Dream
Vous allumez votre navigateur préféré (Pour moi c’est Google Chrome). Puis vous saisissez dans la barre d’url :
Où “192.168.59.103” est l’IP obtenue par la commande “boot2docker ip” tapée précédemment.
Attention, n’oubliez pas le “s” dans “https”.
Vous aurez une mise en garde de sécurité. Vous cliquez alors sur “Paramètres avancés”, puis sur “Continuer vers le site 192.168.59.103 (dangereux)”.
Ne vous inquiétez pas, c’est votre conteneur, il est en local sur votre PC, ça n’a rien de dangereux.
Là on vous demande un mot de passe, vous tapez :
password
Puis vous cliquez sur le lien “dream.ipynb”.
Vous aurez un popUp qui dira qu’une certaine librairie n’a pas pu être chargée. Vous vous en foutez. Rien de grave, vous cliquez sur “OK”.
Là, vous voyez qu’on a un genre de page html avec en titre : “IP Notebook”. En fait, ça permet de modifier et lancer des scripts Python directement dans le navigateur. Super simple, super cool, on est à deux doigts d’y arriver.
En haut, vous verrez un bouton “play”, vous cliquez dessus environ 10 fois (ça lance les scripts les uns après les autres, pas besoin de comprendre.) jusqu’à ce qu’on arrive au Script suivant :
img = np.float32(PIL.Image.open('/src/input.jpg'))
showarray(img)
C’est à ce moment là, que vous pouvez mettre une image (disons “picture.jpg“) dans votre dossier “C:\Users\nomDutilisateurWindows\deepdream“, qui sera considéré par les scripts de votre application Deep Dream comme le dossier “/src“.
Ensuite, directement dans le navigateur vous tapez à la place de “input.jpg”, le nom de l’image que vous avez préalablement placé dans le dossier “C:\Users\nomDutilisateurWindows\deepdream“. Dans mon cas ça sera “picture.jpg“, et le code donnera :
img = np.float32(PIL.Image.open('/src/picture.jpg'))
showarray(img)
Vous remarquerez que j’ai juste changé “input” par “picture”.
Attention, il faut laisser le “/src” avant le nom de l’image.
Vous n’avez plus qu’à cliquer sur le bouton “play” d’en haut environ 12 fois, et laisser tourner les Scripts.
Vous verrez, l’image se modifier au fur et à mesure, et vous pourrez sauvegarder l’image à chacun des stades de sa modification (clic droit sur la photo qui se modifie, puis “Ouvrir l’image dans un nouvel onglet”).
Soyez gentil au début, mettez une image pas trop lourde, parce que vous pouvez faire planter le conteneur. (C’est ce qui vient de m’arriver).
Si cela arrive, vous retournez dans le terminal, puis vous tapez :
docker stop
Vous attendez, quelques secondes que votre conteneur “s’éteigne”, puis vous reprenez à partir du chapitre “Lancer Deep Dream”. Et vous déroulez à nouveau le processus. (Hormis la création de dossier et le déplacement d’images).
Bon, là, on a appris à configurer tout ça en mode feignasse sans rien comprendre, je compte sur vous pour aller plus loin, et voici quelques pistes pour vous y aider :
- L’article du blog de recherche Google sur le sujet
- Une galerie d’images d’essais par les mecs de chez Google
- Le lien du Tutoriel en Anglais, pour ceux qui ont un Mac
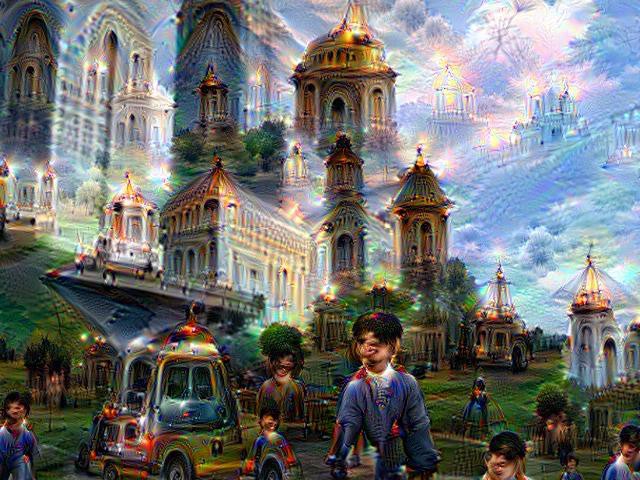
Moi j’ai tenté avec cette image :
External image
À vous de jouer 🙂
Faire du Google deep dream sous Windows 8.1
Configurer Deep Dream
Vous allez pouvoir télécharger le conteneur Docker de notre ami Blogueur par le biais du lien ci-dessous. Cliquez sur le bouton “Download ZIP” en bas de la colonne de droite :
Vous déplacez le fichier zip téléchargé dans un dossier “peu importe le nom mais moi je l’ai nommé deepdreamdocker” dans votre dossier personnel sous Windows (chez moi ça donne : “C:\Users\nomDutilisateurWindows\deepdreamdocker“). Puis vous dé-Zippez l’archive à cette même place.
Vous retournez dans le terminal Docker que normalement vous n’avez pas fermé, puis vous tapez :
cd deepdreamdocker
Où “deepdreamdocker” est le nom du dossier que vous avez créé. La commande permet d’entrer dans ce nouveau dossier.
Ensuite, vous tapez :
docker build -t ryankennedy/deepdream
Où “ryankennedy” est le nom du blogueur qui a préparé tout ça pour que nous, pauvres mortels, utilisateurs de Windows, plus artistes que matheux, puissions aussi toucher du doigt la félicité de pouvoir faire rêver Google :D. J’imagine que n’importe quel mot à la place de “ryankennedy” fonctionnerait ici, mais j’ai préféré me la jouer “Si je fais tout comme il faut, ça va trop marcher”.
Là, c’est un peu long donc vous pouvez comme dirait l’auteur du blog :
ça peut prendre pas mal de temps vu que ça télécharge 3GB de données pour le conteneur.
à la fin, vous retrouverez le célèbre :
nomDutilisateurWindows@NOM-DU-PC
$
Qui vous indiquera que tout s’est bien déroulé. Là aussi, ne fermez pas le terminal, vous allez encore en avoir besoin.
Installer Docker
Tout d’abord, on va installer Docker. C’est un genre de logiciel de gestion de package.
Pour ce faire, on va récupérer le fichier d’installation pour Windows de Docker direct sur sa page github :
On clique sur le lien “docker-install.exe” pour le télécharger et on double clique dessus une fois terminé pour que ça installe sur le PC les quelques éléments que voici :
- Le client Docker
- VirtualBox qui est un logiciel de gestion de machines virtuelles (En gros, un PC dans un PC, et ça peut même faire tourner OSX dans Windows ! Sisi !).
- Git qui est un logiciel de gestion de sources, c’est à dire que ça permet de télécharger les derniers fichiers à jours d’une application, en direct du cloud.
Perso, j’avais déjà virtualBox et Git d’installé, et je ne les ai pas désinstallés avant de lancer l’installation de Docker. Donc ne vous prenez pas la tête (je sais c’est pas très propre, mais j’ai eu la flemme 😉 ). Le principal, c’est que ça fonctionne.
Vous suivez le wizard de l’installateur (next, ok, …) et à la fin de l’installation, un raccourci “Boot2Docker Start” aura été créé sur le bureau.
Vous double cliquez dessus, ça ouvre un invité de commande (Un terminal sous Windows, vous savez, la boîte de dialogue dans laquelle c’est écrit en blanc sur fond noir ^^). Il faut ensuite attendre que le lancement de Docker soit terminé. ça sera quand vous verrez dans le terminal :
nomDutilisateurWindows@NOM-DU-PC
$
Où “nomDutilisateurWindows” est votre nom d’utilisateur de votre Windows et “NOM-DU-PC” est le nom que vous avez donné à votre PC.
Là vous pouvez lancer cette commande à la suite du “$” qui va vous permettre de vérifier si l’installation s’est bien déroulée :
docker version
ça devrait vous donner quelque chose comme ça :
$ docker version
Client version: 1.7.1
Client API version: 1.19
Go version (client): go1.4.2
Git commit (client): 786b29d
OS/Arch (client): windows/amd64
Server version: 1.7.1
Server API version: 1.19
Go version (server): go1.4.2
Git commit (server): 786b29d
OS/Arch (server): linux/amd64
Hyper ! Votre client Docker fonctionne !
Vous avez donc mis en place le gestionnaire de machine virtuelle toute configurée qui va bien pour faire tourner les Scripts du Deep Dream de Google.
Ne fermez pas cette fenêtre, vous aurez besoin d’y revenir très bientôt ;).
Подборки
Армейские ПесниКлассика пианиноМузыка из рекламыДетские песни из мультфильмовМузыка для аэробикиСборник песен 70х годовДля любимого человекаКлассика в современной обработкеКлубные миксы русских исполнителей3D ЗвукДальнобойщикиЗарубежный рэп для машиныТоповые Клубные ТрекиМощные БасыДискотека 2000Песни про папуХристианские ПесниЗимняя МузыкаМузыка Для МедитацииРусские Хиты 90ХГрустная МузыкаRomantic SaxophoneТанцевальный хип-хопНовогодние песниЗарубежные хиты 80 — 90Песни про покемонаРомантическая МузыкаМотивация для тренировокМузыка для сексаМузыка в машинуДля силовых тренировокПремия «Grammy 2017»
Саундтреки
Из фильма В центре вниманияИз фильма Ван ХельсингИз сериала Дневники ВампираИз фильма Скауты против зомбииз фильмов ‘Миссия невыполнима’Из фильма Голодные игры: Сойка-пересмешница. Часть 2OST ‘Свет в океане’OST «Большой и добрый великан»из фильма ‘Новогодний корпоратив’из фильма ‘Список Шиндлера’ OST ‘Перевозчик’Из фильма Книга джунглейиз сериала ‘Метод’Из фильма ТелохранительИз сериала Изменыиз фильма Мистериум. Тьма в бутылкеиз фильма ‘Пассажиры’из фильма ТишинаИз сериала Кухня. 6 сезониз фильма ‘Расплата’ Из фильма Человек-муравейиз фильма ПриглашениеИз фильма Бегущий в лабиринте 2из фильма ‘Молот’из фильма ‘Инкарнация’Из фильма Савва. Сердце воинаИз сериала Легко ли быть молодымиз сериала ‘Ольга’Из сериала Хроники ШаннарыИз фильма Самый лучший деньИз фильма Соседи. На тропе войныМузыка из сериала «Остров»Из фильма ЙоганутыеИз фильма ПреступникИз сериала СверхестественноеИз сериала Сладкая жизньИз фильма Голограмма для короляИз фильма Первый мститель: ПротивостояниеИз фильма КостиИз фильма Любовь не по размеруOST ‘Глубоководный горизонт’Из фильма Перепискаиз фильма ‘Призрачная красота’Место встречи изменить нельзяOST «Гений»из фильма ‘Красотка’Из фильма Алиса в ЗазеркальеИз фильма 1+1 (Неприкасаемые)Из фильма До встречи с тобойиз фильма ‘Скрытые фигуры’из фильма Призывиз сериала ‘Мир Дикого Запада’из игр серии ‘Bioshock’ Музыка из аниме «Темный дворецкий»из фильма ‘Американская пастораль’Из фильма Тарзан. ЛегендаИз фильма Красавица и чудовище ‘Искусственный интеллект. Доступ неограничен»Люди в черном 3’из фильма ‘Планетариум’Из фильма ПрогулкаИз сериала ЧужестранкаИз сериала Элементарноиз сериала ‘Обратная сторона Луны’Из фильма ВаркрафтИз фильма Громче, чем бомбыиз мультфильма ‘Зверопой’Из фильма БруклинИз фильма Игра на понижениеИз фильма Зачарованнаяиз фильма РазрушениеOST «Полный расколбас»OST «Свободный штат Джонса»OST И гаснет светИз сериала СолдатыИз сериала Крыша мираИз фильма Неоновый демонИз фильма Москва никогда не спитИз фильма Джейн берет ружьеИз фильма Стражи галактикииз фильма ‘Sos, дед мороз или все сбудется’OST ‘Дом странных детей Мисс Перегрин’Из игры Contact WarsИз Фильма АмелиИз фильма Иллюзия обмана 2OST Ледниковый период 5: Столкновение неизбежноИз фильма Из тьмыИз фильма Колония Дигнидадиз фильма ‘Страна чудес’Музыка из сериала ‘Цвет черёмухи’Из фильма Образцовый самец 2из фильмов про Гарри Поттера Из фильма Дивергент, глава 3: За стеной из мультфильма ‘Монстр в Париже’из мультфильма ‘Аисты’Из фильма КоробкаИз фильма СомнияИз сериала Ходячие мертвецыИз фильма ВыборИз сериала Королек — птичка певчаяДень независимости 2: ВозрождениеИз сериала Великолепный векиз фильма ‘Полтора шпиона’из фильма Светская жизньИз сериала Острые козырьки
Before Dreaming
Before dreaming with Deep Dream, you need to build the container:
$ git clone https://github.com/saturnism/deepdream-docker$ cd deepdream-docker$ docker build -t deepdream ....Successfully built ...
To run it:
$ docker run -p 8888:8888 -v /tmp:/deepdream/deepdream/files -ti deepdream Created profile dir: u'/root/.ipython/profile_default'... The IPython Notebook is running at: http://:8888/ Use Control-C to stop this server and shut down all kernels (twice to skip confirmation).
If you are using Docker Machine on a remote host, make sure you allow port 8888 access (learn how in my article on using Docker Machine in Google Compute Engine).
You should now be able to access your Deep Dream notebook by browsing to the Docker server on port 8888.
http://xxx.xxx.xxx.xxx:8888/notebooks/dream.ipynb
And you’ll see something like this:

IPython Notebook
A Deep Dream Nightmare
Deep Dream source code is on GitHub. I thought it would be easy to just download, install, and run it. But it turned out to be much harder — there are no instructions on how to run the source code, nor how to install the dependencies.
There were plenty of Deep Dream installation instructions circulating on the web, but each was slightly different, and mostly were complicated. The most complex dependency to install was Caffe.
Rather than installing the software only once on my laptop, I also wanted to run it in virtual machines as well. I needed to have consistent and reproducible builds of the Deep Dream dependencies so I could run it anywhere.
Lancer Deep Dream
Une fois que le Conteneur est tout bien construit, il faut le lancer en tapant la commande suivante dans le terminal :
docker run -d -p 443:8888 -e "PASSWORD=password" -v //c/Users/nomDutilisateurWindows/deepdream:/src ryankennedyio/deepdream
Attention, là c’est important : “//c/Users/nomDutilisateurWindows” est l’endroit de votre disque dur dans lequel le conteneur sera lancé. ça doit absolument être votre dossier personnel Windows.
Il faut respecter les lettres Majuscules.
Et “/deepdream” sera un nouveau dossier que vous aurez créé dans votre dossier personnel Windows.
Je n’ai pas tout compris, mais en gros, “//c/Users/nomDutilisateurWindows/deepdream” deviendra le dossier partagé dans lequel vous placerez les images avec lesquelles vous voulez jouer, parce qu’elles seront accessibles à l’application que vous venez de lancer.
Oui, c’est pas le même nouveau dossier que celui dans lequel j’ai extrait l’archive zip, et là encore, je ne pense pas que ça ait une grande importance. C’est pour avoir un dossier tout propre, et voir si ça créé un système de fichiers dans ce dossier nouvellement créé.
Rappelez-vous seulement qu’il faut que ça soit dans son dossier personnel Windows.
Si tout s’est bien passé, vous devriez voir une suite de caractères dans le terminal, juste après la ligne de commande pour lancer le conteneur.
Là, vous tapez :
boot2docker ip
ça doit vous donner une adress IP. Chez moi ça a donné :
192.168.59.103
il se peut que pour vous ça soit un peu différent ou pas ^^.
Ne fermez toujours pas le terminal. (Je ne sais pas si ça joue parce que je n’ai pas testé, mais j’ai dans l’idée, qu’il faut qu’il reste allumé pour que ça fonctionne correctement 😉 ).
Lots More Information
Author’s Note: How Google Deep Dream Works
Computers aren’t making art. Not yet, anyway. And they aren’t dreaming, either. Both of those processes are distinctly human and are affected profoundly by personal culture, physiology, psychology, life experiences, geography and a whole lot more. Computers may absorb a lot of data regarding those variables, but they don’t experience and process them the same way as people. So if you’re worried that technology is making your human experiences obsolete, don’t fret just yet. Your perception of the world goes a whole lot deeper than that of a computer network.
Related Stories
- How Image Recognition Software Works
- How Facial Recognition Machines Work
- What if there were no Google?
- 5 Reasons Why You Dream
Sources
- Brownlee, John. «Why Google’s Deep Dream A.I. Hallucinates in Dog Faces.» FastCoDesign. July 23, 2015. (Aug. 22, 2015) http://www.fastcodesign.com/3048941/why-googles-deep-dream-ai-hallucinates-in-dog-faces
- Bulkeley, Kelly. «Algorithms of Dreaming: Google and the ‘Deep Dream’ Project.» Psychology Today. July 14, 2015. (Aug. 22, 2015) https://www.psychologytoday.com/blog/dreaming-in-the-digital-age/201507/algorithms-dreaming-google-and-the-deep-dream-project
- Campbell-Dollaghan, Kelsey. «This Artist is Making Haunting Paintings with Google’s Dream Robot.» Gizmodo. July 9, 2015. (Aug. 22, 2015) http://gizmodo.com/this-human-artist-is-making-hauting-paintings-with-goog-1716597566
- Chayka, Kyle. «Why Google’s Deep Dream is Future Kitsch.» Pacific Standard. July 10, 2015. (Aug. 22, 2015) http://www.psmag.com/nature-and-technology/googles-deep-dream-is-future-kitsch
- Clark Estes, Adam. «Watch How Google’s Artificial Brain Transforms Images in Real Time.» Gizmodo. July 10, 2015. (Aug. 22, 2015) http://gizmodo.com/watch-how-googles-artificial-brain-transforms-images-in-1717058258
- Culpan, Daniel. «These Google ‘Deep Dream’ Images Are Weirdly Mesmerizing.» Wired. July 3, 2015. (Aug. 22, 2015) http://www.wired.co.uk/news/archive/2015-07/03/google-deep-dream
- Gershgorn, Dave. «These Are What the Google Artificial Intelligence’s Dreams Look Like.» Popular Science. June 19, 2015. (Aug. 22, 2015) http://www.popsci.com/these-are-what-google-artificial-intelligences-dreams-look
- Hern, Alex. «Yes, Androids Do Dream of Electric Sheep.» The Guardian. June 18, 2015. (Aug. 22, 2015) http://www.theguardian.com/technology/2015/jun/18/google-image-recognition-neural-network-androids-dream-electric-sheep
- Kay, Alexx. «Artificial Neural Networks.» ComputerWorld. Feb. 12, 2001. (Aug. 22, 2015) http://www.computerworld.com/article/2591759/app-development/artificial-neural-networks.html
- McCormick, Rich. «First Computers Recognized Our Faces, Now They Know What We’re Doing.» The Verge. July 17, 2015. (Aug. 22, 2015) http://www.theverge.com/2015/7/17/8985699/stanford-neural-networks-image-recognition-google-study
- Melanson, Don. «Google’s Deep Dream Weirdness Goes Mobile with Unofficial Dreamify App.» TechTimes. Aug. 10, 2015. (Aug. 22, 2015) http://www.techtimes.com/articles/75574/20150810/googles-deep-dream-weirdness-goes-mobile-unofficial-dreamify-app.htm
- Mordvintsev, Alexander et al. «Inceptionism: Going Deeper Into Neural Networks.» Google Research Blog. June 17, 2015. (Aug. 22, 2015) http://googleresearch.blogspot.co.uk/2015/06/inceptionism-going-deeper-into-neural.html
- Mordvintsev, Alexander and Mike Tyka. «DeepDream — A Code for Visualizing Neural Networks.» Google Research Blog. July 1, 2015. (Aug. 22, 2015) http://googleresearch.blogspot.jp/2015/07/deepdream-code-example-for-visualizing.html
- Rosenthal, Emerson. «Google’s Deep Dream for Dummies.» Vice. Aug. 3, 2015. (Aug. 22, 2015) http://www.vice.com/read/no-they-dream-of-puppy-slugs-0000703-v22n8
- Sufrin, Jon. «Google’s Deep Dream Images Are Eye-Popping, but Are They Art?» CBC. July 31, 2015. (Aug. 22, 2015) http://www.cbc.ca/beta/arts/google-s-deep-dream-images-are-eye-popping-but-are-they-art-1.3163150
Your First Deep Dream
You can use the default images, and start from the top and run every cell in the IPython Notebook:

Click on the Run Cell button to run the Deep Dream code. You’ll need to run through all of it!
This will generate pretty cool images from the defaults.
The fun really starts when you use your own image! To use your own image, you can copy the image into the Docker host’s /tmp directory (since that’s how we mounted it — feel free to change it). If you run a Docker container locally, simply copy the file over:
$ cp myimage.jpg /tmp
If you use Docker Machine, then you can use`docker-machine scp`:
$ docker-machine scp myimage.jpg mydockermachine:/tmp
If you scroll down in the IPython Notebook, you can replace the image file with the file you uploaded. You’ll need to click the Run Cell button again:

And start Deep Dreaming!
Generate a Deep Dream Video
Now that you know the basics, you can have a lot of fun with the Deep Dream IPython Notebook! For example, you can use one of the code snippets to generate 100 frames (or more) by recursively feeding Deep Dream its own output and applying a little zoom to it. It will “ to an endless stream of impressions of the things that the network saw during training”, and some pretty cool images.
You can then copy all of the generated frames out of the container:
$ docker cp containerid:/deepdream/deepdream/frames ~/
And stitch them together using ffmpeg to produce a Deep Dream video:
$ ffmpeg -framerate 30 -pattern_type glob -i '*.jpg' -c:v libx264 -r 30 -pix_fmt yuv420p out.mp4
Easiest Way to Deep Dream
Running IPython Notebook and using the UI to create Deep Dream images can be rather cumbersome. I needed an easy way to be able to create Deep Dream images utilizing the CPUs in my Docker Machine on the Google Compute Engine. For that, I created a CLI-friendly Docker Container, and you and find the source on my GitHub under the deepdream-cli-docker repository.
To use it, first build the image:
$ git clone https://github.com/saturnism/deepdream-cli-docker.git$ cd deepdream-cli-docker$ docker build -t deepdream-cli .
Then you can generate Deep Dream images directly from the command line. It uses a couple of Tips and Tricks that I learned from using a Docker Machine that are handy ways to build containers that plays well with UNIX command line:
$ cat moon.jpg | docker run -i deepdream-cli > output.jpg
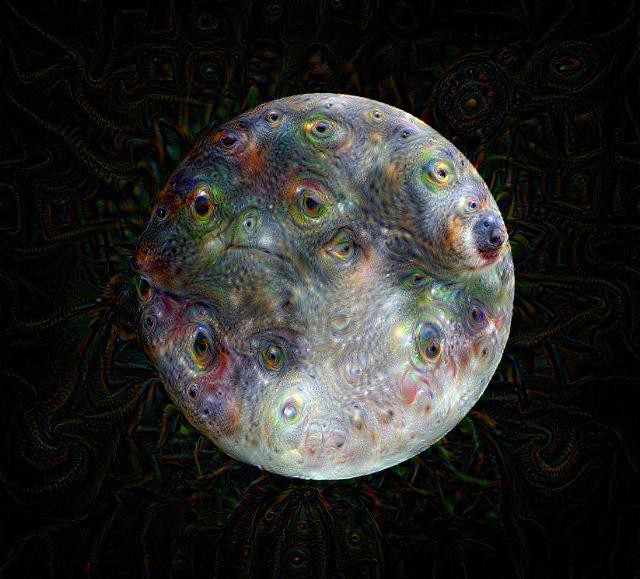
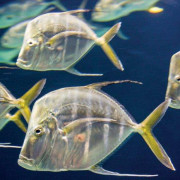
The Moon in Deep Dream. Original on Flickr
You can also experiment with some variables to Deep Dream at different neural network levels, with different iterations, and octaves. The resulting images may vary significantly:
$ cat myimage.jpg | docker run -i deepdream-cli -l conv2/3x3 -o 6 > output.jpg

The Moon in Deep Dream. Original on Flickr
Just like any command line tools, you can find all of the possible arguments here:
$ docker run deepdream-cli -h
Unfortunately, the Deep Dream process is single threaded. Having more CPUs does not reduce duration to generate a single image. You can, however, generate multiple images at a time to better utilize the resources. For example, to process all of the images under a directory:
for f in *.jpg; \ do { cat $f | docker run -i deepdream-cli > out_$f; } & \done;
Docker to the Rescue
Docker came into my mind immediately. With Docker, I can write all of the installation steps/commands in a Dockerfile, and Docker will follow the instructions to build all of the dependencies and install the Deep Dream source code. The end result is a Docker container image that is portable — I can run it locally, or in any virtual machine that runs Docker.
My Deep Dream Dockerfile is on GitHub. It will:
- Install dependencies that are required to compile Caffe
- Compile and install Caffe
- Install dependencies that are required by Deep Dream
- Install the latest version of IPython Notebook
- Download the neural network model
- Set up necessary environment variables
- Finally, start IPython Notebook
Original on Flickr.